

A Stunning DIY Dining Room Chair Makeover
Finding the “right” dining room chairs for my space has been a constant search for the 2 years since our home has been rebuilt (it flooded in Hurricane Harvey and underwent a major renovation following). That room has gone through several renditions as I’ve found and compiled pieces together, pulled things out that didn’t quite work, and revised the plan and furnishings.
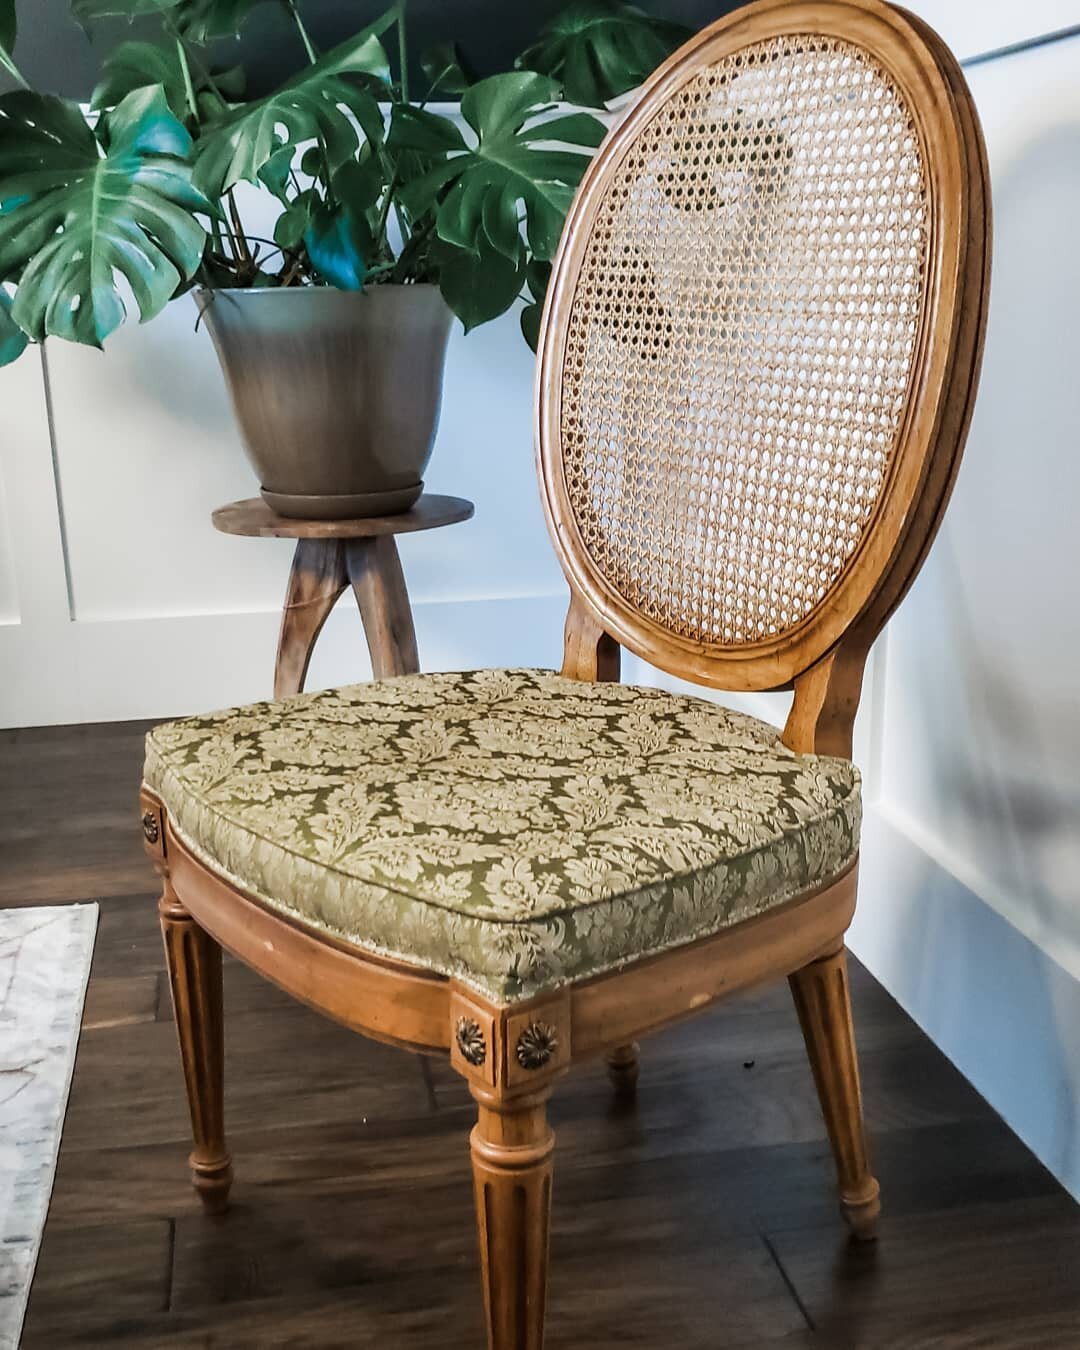
Finally, I feel like I’ve landed on a look worth keeping around for a while. I snagged a dining table and chairs set off of Facebook Marketplace some time ago for only $75.00 that I have since refinished. I sold the refinished dining table (a lovely french inspired oval fluted table from the 60’s…which I sold for $150 btw cuz I’m a furniture flipping ninja) but I decided to hold on to the 8 chairs (also french inspired vintage lovelies with oval cane backs and fluted legs), because it is damn near impossible to get a hold of a full set of 8 dining chairs, especially for as little cash as I had manage to snag these for. Then the chairs sat, neglected, in my garage for several months while I toyed around with other furniture and layouts for my dining room. Then one day the decor Godesses shined down on me and I came across a magnificent round dining table for a good price (also from Facebook Marketplace) that was 72” in diameter, a perfect size for my room and the winning companion to these 8 little beauties I’d squirreled away.
It was a little red-faced (probably embarrassed by all its nicks and scratches), so I stripped it down and refinished it to coordinate better with the caning in my chairs and the overall tones in the room. You can find those before and after’s as well as refinishing tips here.
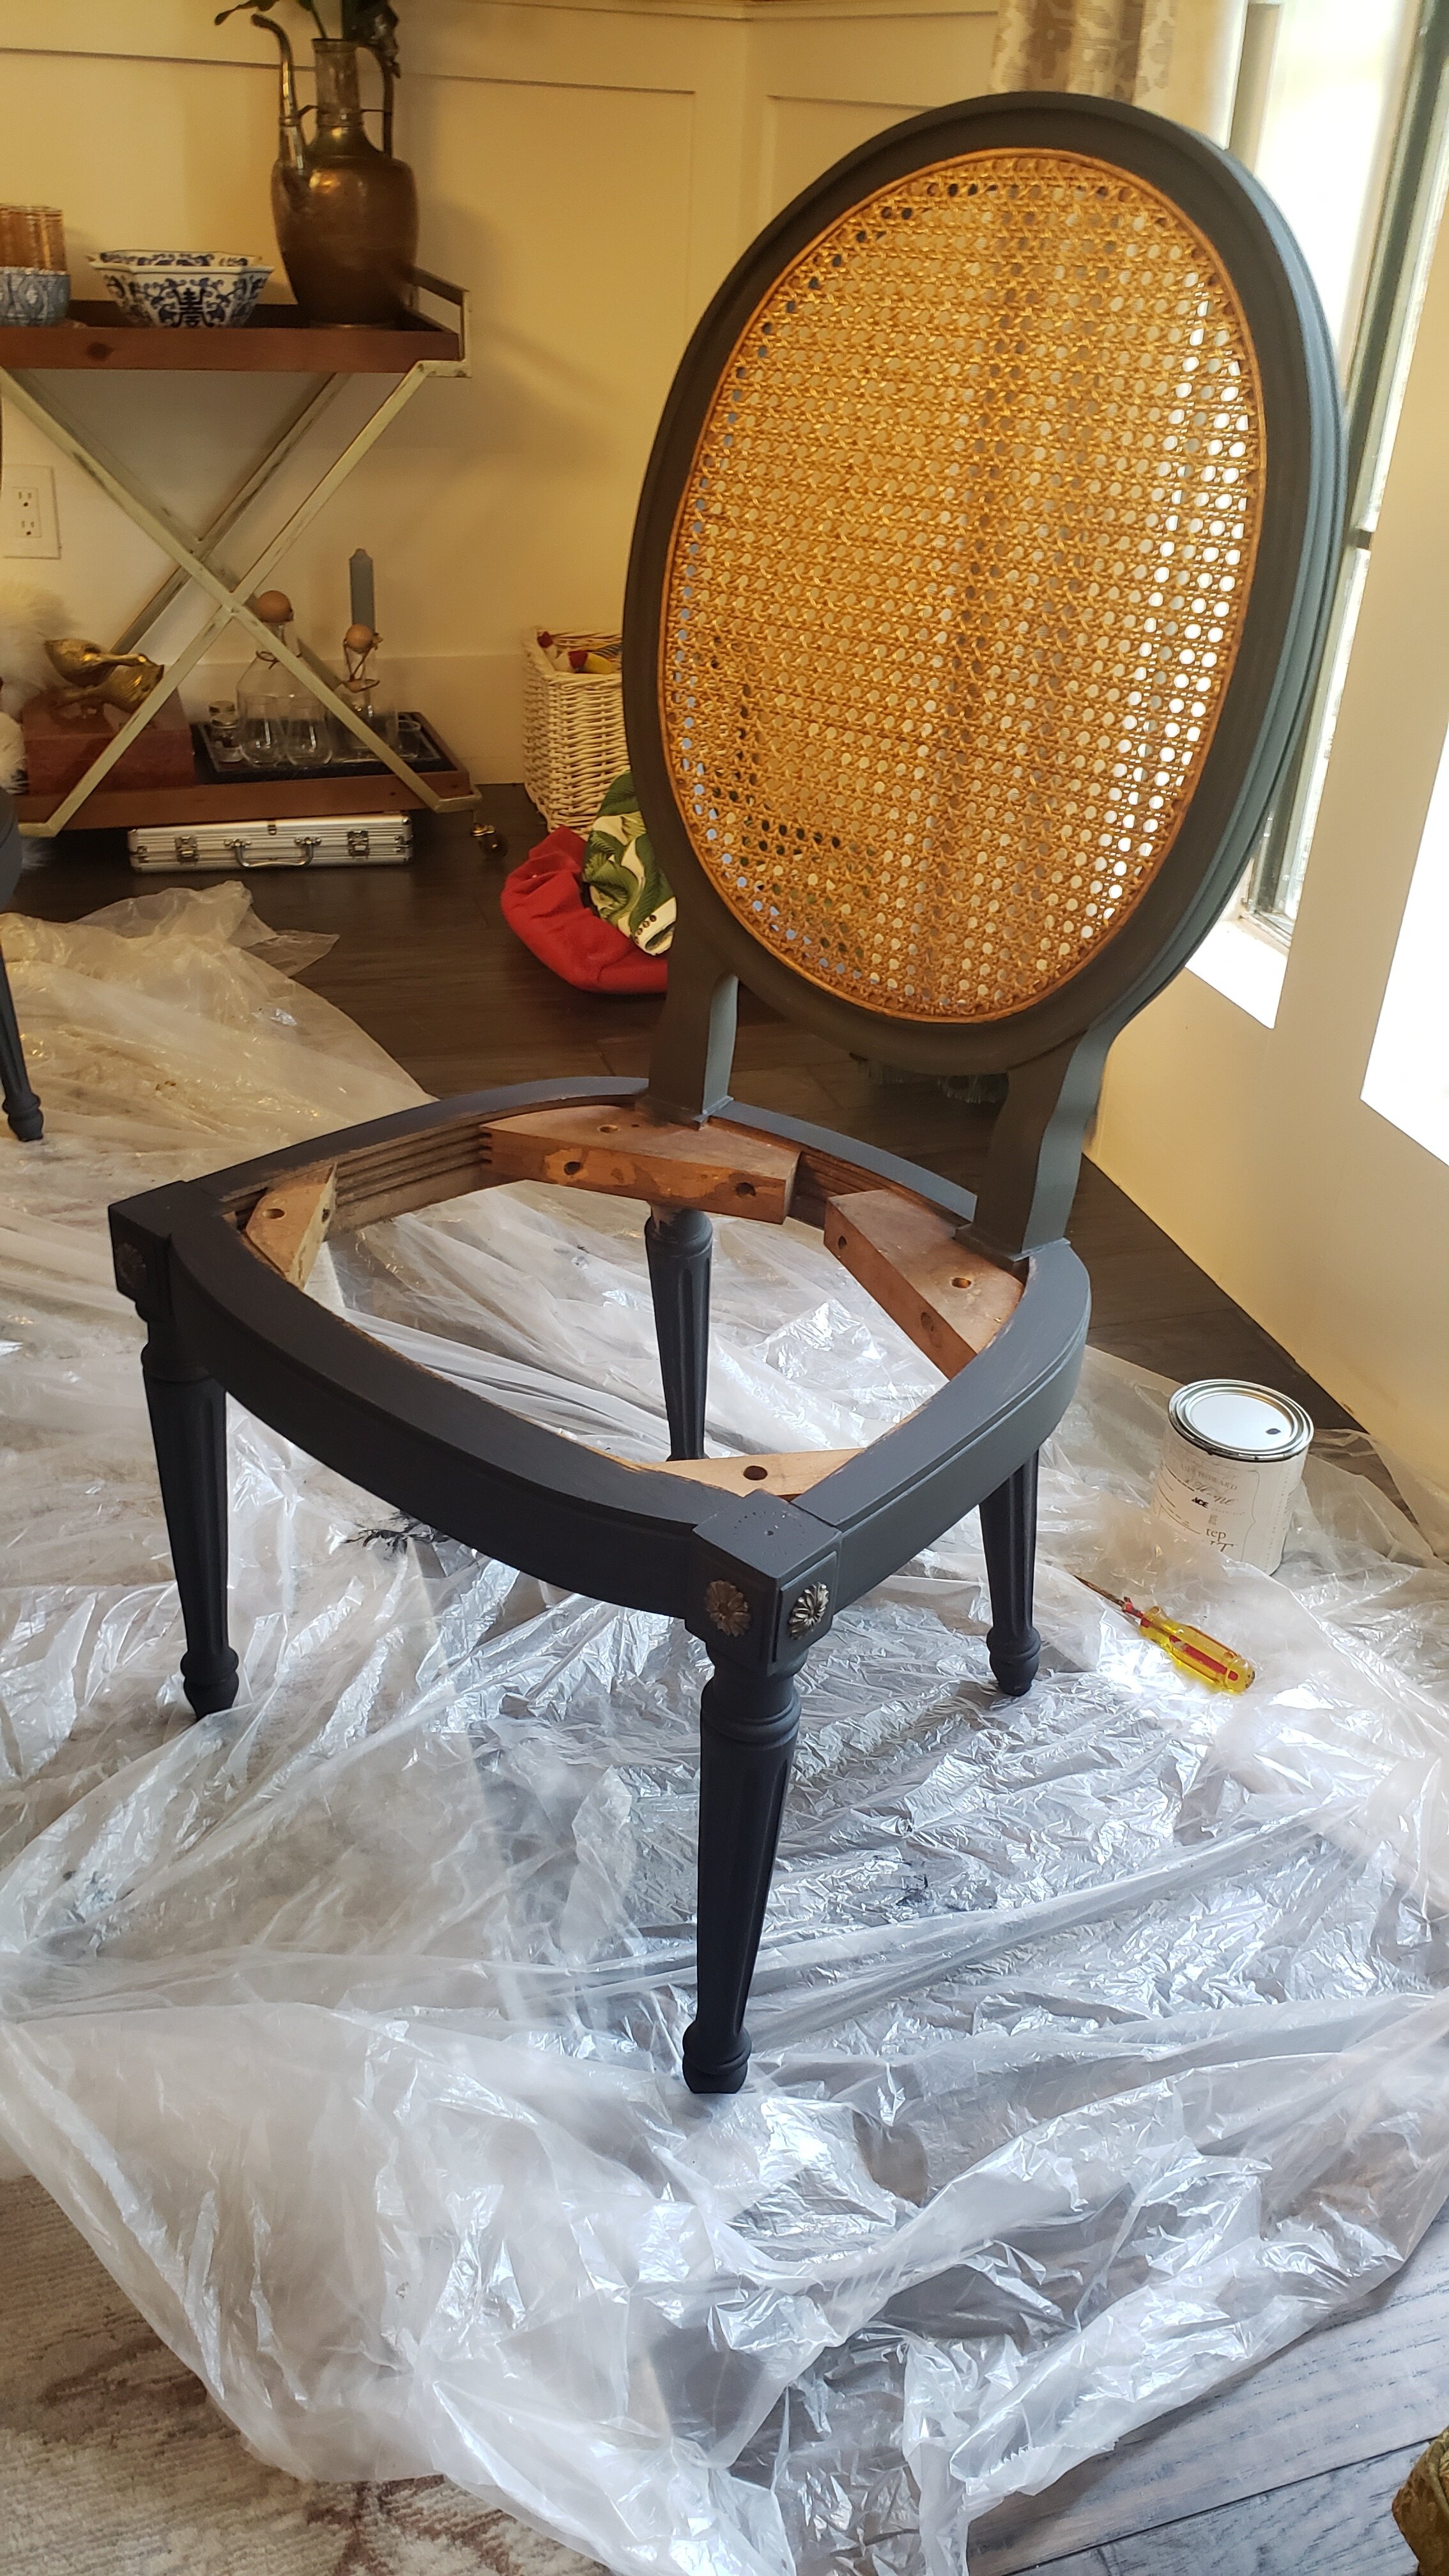
Anyway, with the table refinished it was time to get to the down and dirty work of refinishing the chairs. No easy feat for sure, but well worth it. After way more procrastination than I'd like to admit, I finally cleaned them up and readied them for a coat of paint and wax. But first, I had to remove the arms off the two chairs that were once “head and foot” chairs when paired with their old oval table. Seeing as I wanted to use them around a round table (therefore a table without a head or foot) I really didn’t want any of the set to have arms. So, I examined the armed chairs closely and easily found a way to remove the arms without inflicting damage to the chairs, thereby creating a seamless set of 8 side chairs.
After the arms were removed, I cleaned the chairs up with Krud Kutter spray cleaner/deglosser and prepped the area to begin to paint. I then used a combination of a small chiseled artist brush and larger chiseled paint brush to brush on black chalk paint to the frames and legs, carefully avoiding the caning which I intended to leave in its current warm brown tone. I love chalk paint for these types of projects because it takes very little prep, goes on smoothly, and can be done indoors because it is virtually odor-free.
After painting on 2 coats to each chair (which took a few days of a couple hours work here and there) I used a clear wax to seal the paint and add a soft sheen. I applied the wax with a large dense round brush and then wiped it off and buffed it in with a microfiber cloth. This kind of finishing work does get your heart pumping and takes some effort but is well worth it to protect your freshly painted pieces.
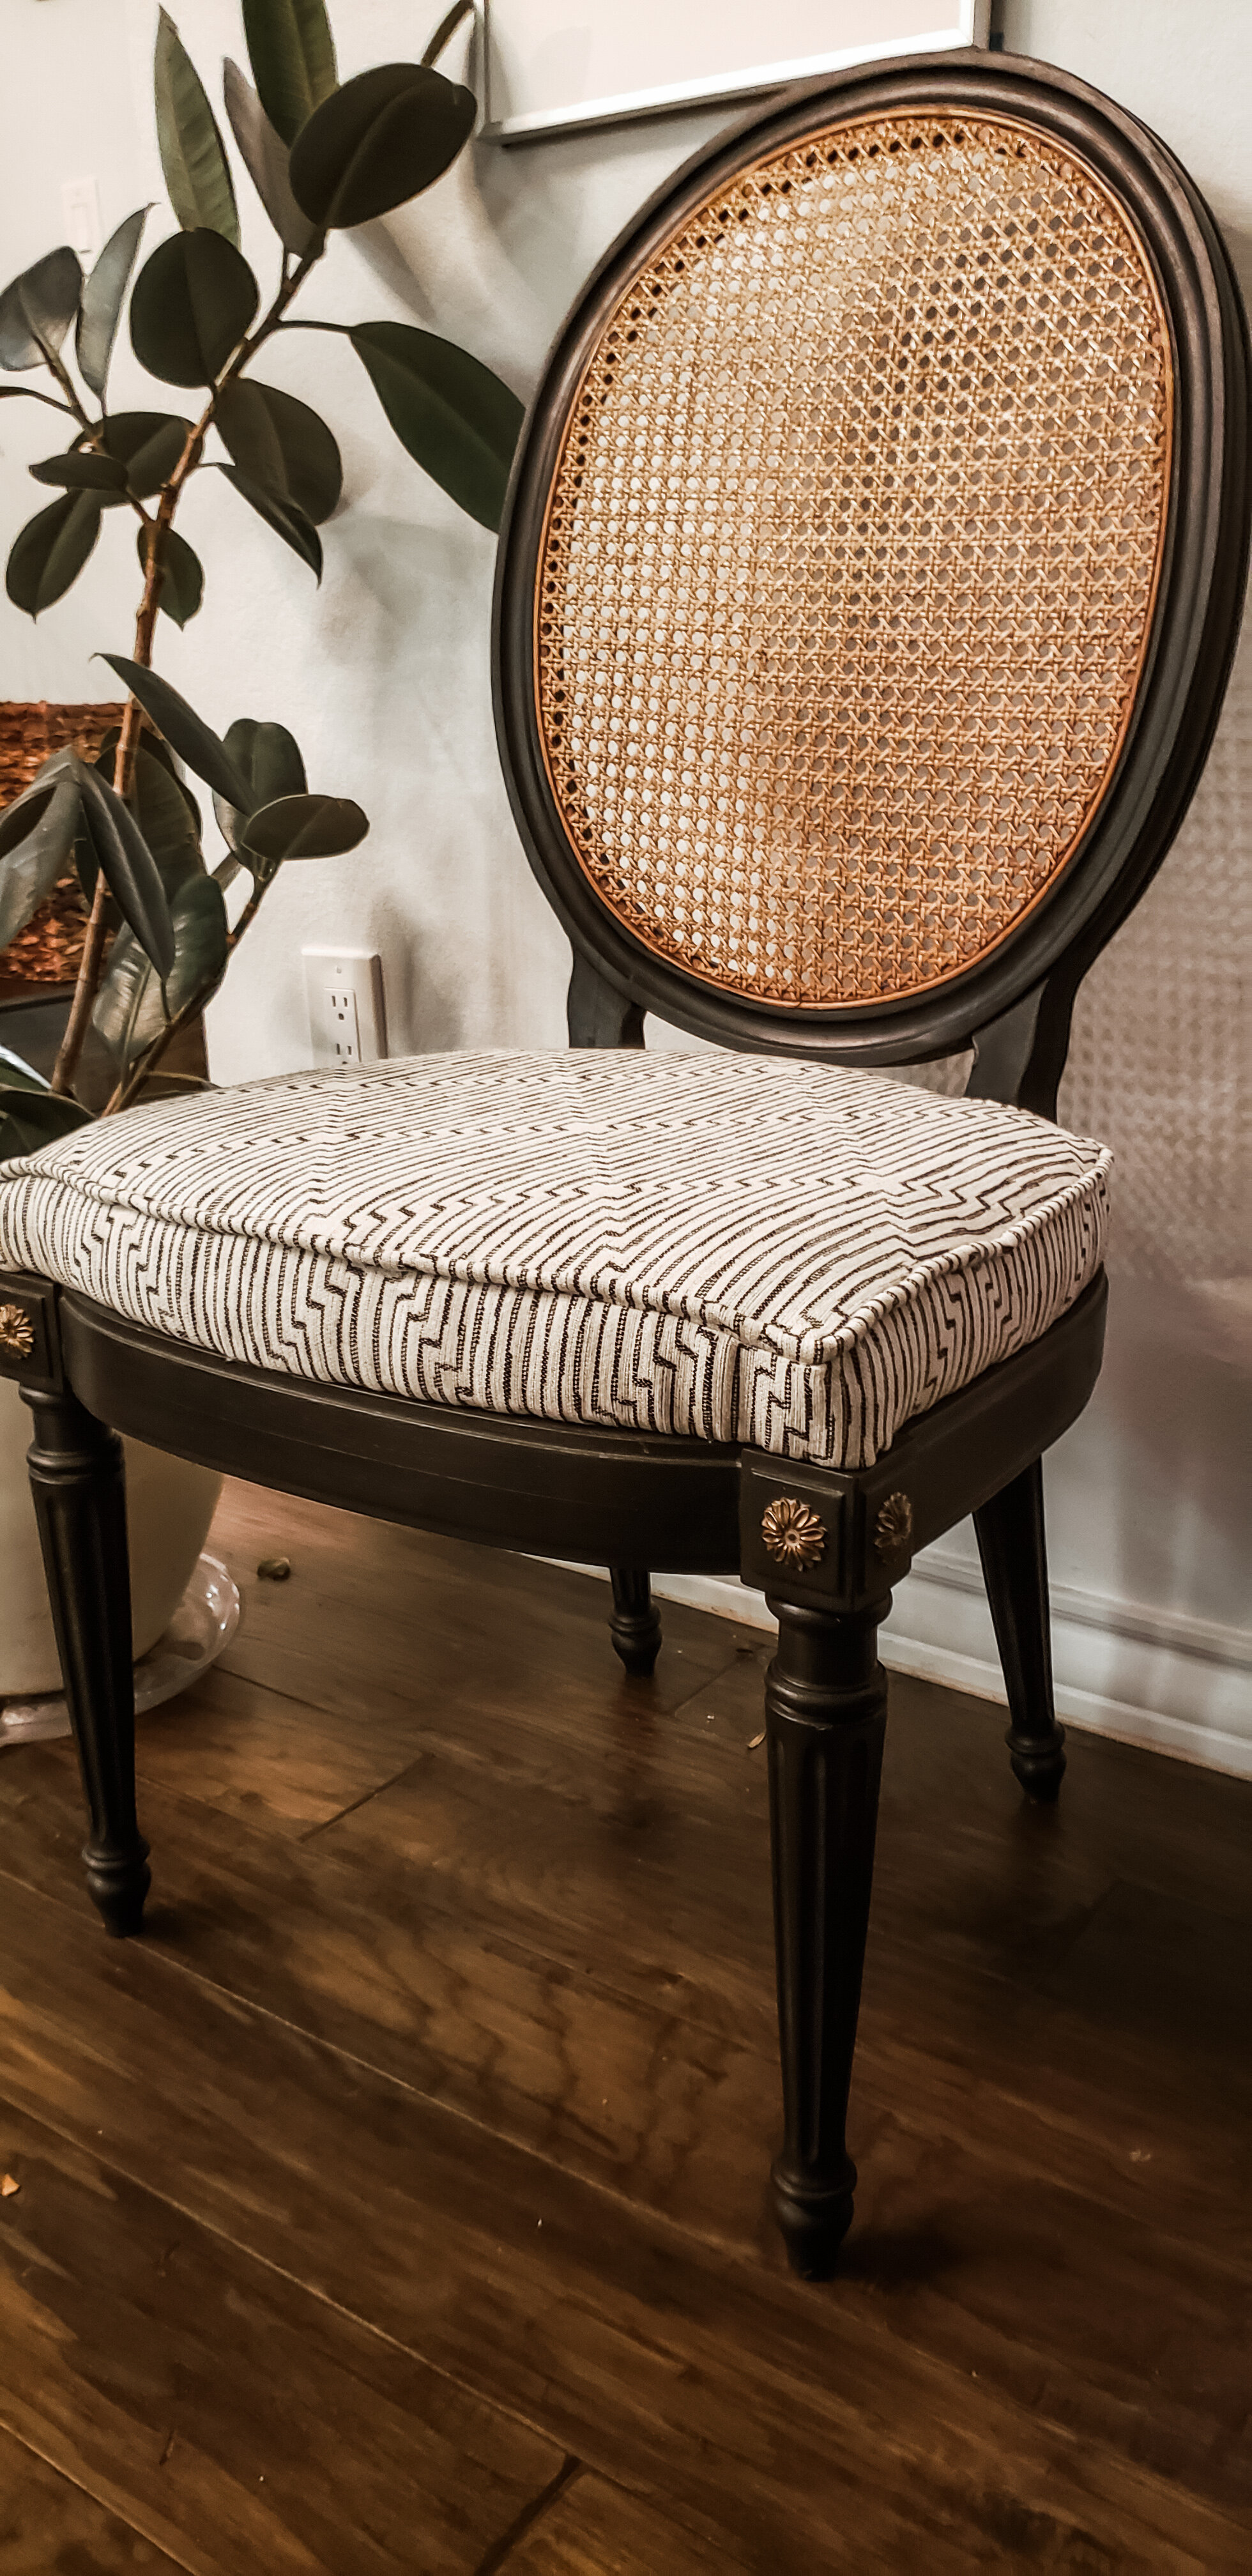
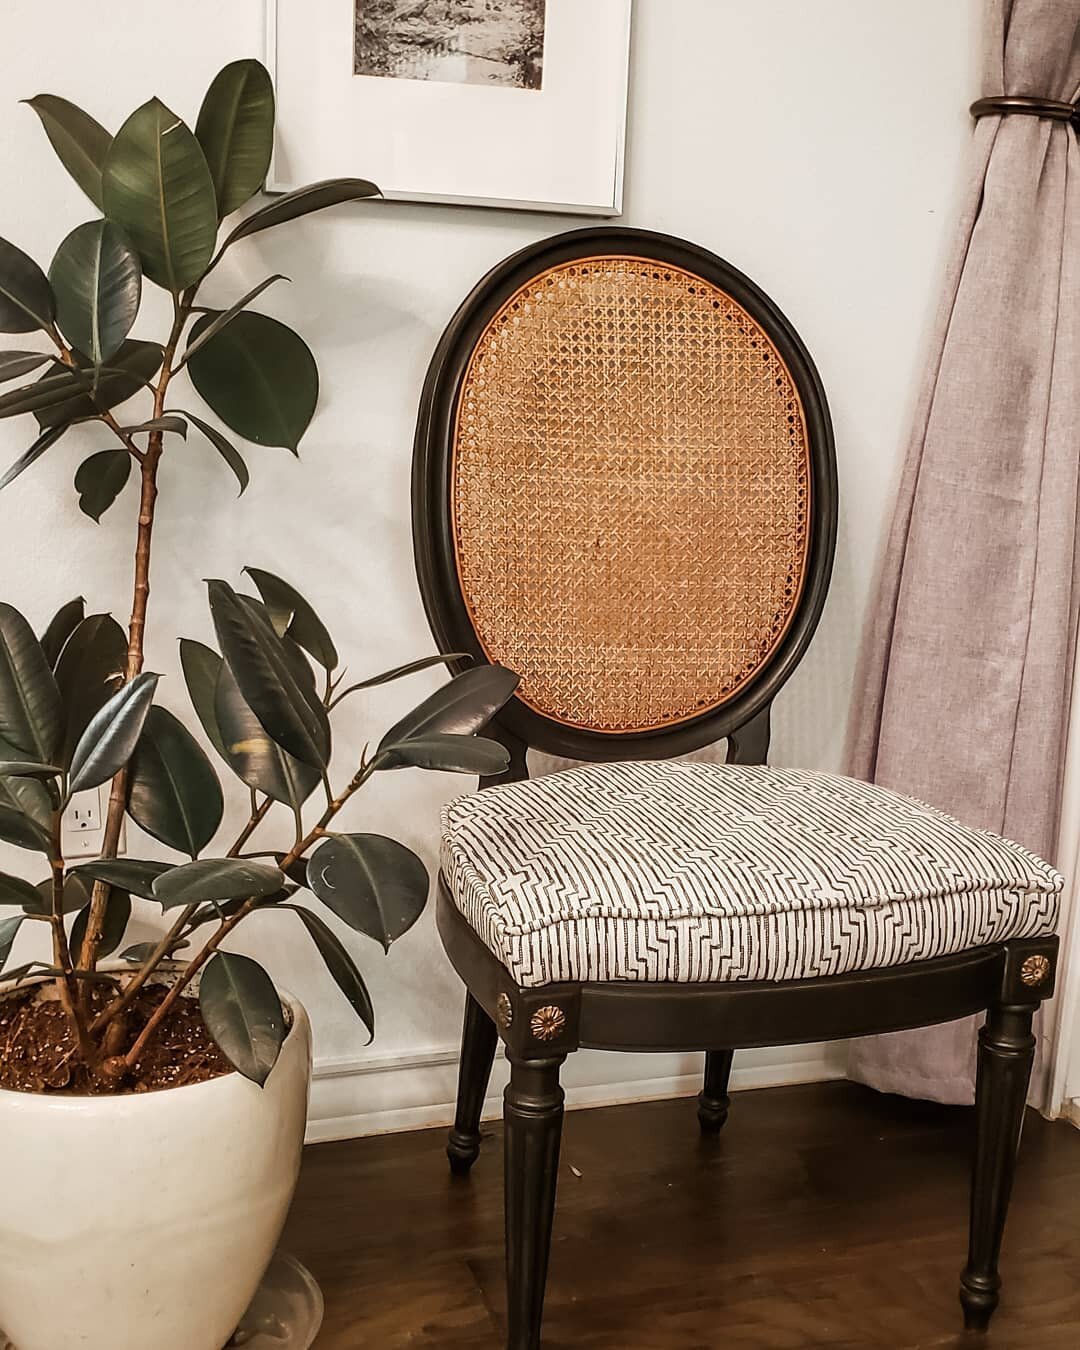
Selecting fabric was a bit of a rollercoaster for this project. I thought I’d found something that I liked and I did one seat up and just couldn’t commit to it enough to do the rest. So after draping fabrics over each chair and staring at them until all the patterns melted together, I finally landed on a beautiful mildly geometric black and white print in a medium-heavyweight upholstery fabric. I think it adds just enough pattern to update the chairs into the slightly eclectic vibe I wanted without detracting from their overall traditional style.
I decided to go the extra mile and create the welting or piping as was in the original cushion. It definitely takes more time and patience than simply wrapping and stapling would, but I felt it was well worth it in the end. The welt definitely elevates the style and creates a much more custom and professional look. After all, no one wants their DIY’d projects to look DIY’d, right?
For more tips and tutorials, please subscribe to Nest Refresh on YouTube and be sure to “like” and “follow” on Instagram, Tiktok, and Facebook.
If you need help deciding if/how to upcycle your own home furnishings, contact us at Nest Refresh today. We are your interior design navigators as you create a home you love.